How PrintWise3D works.
From dropped model to first successful print in minutes. No engineering degree required.
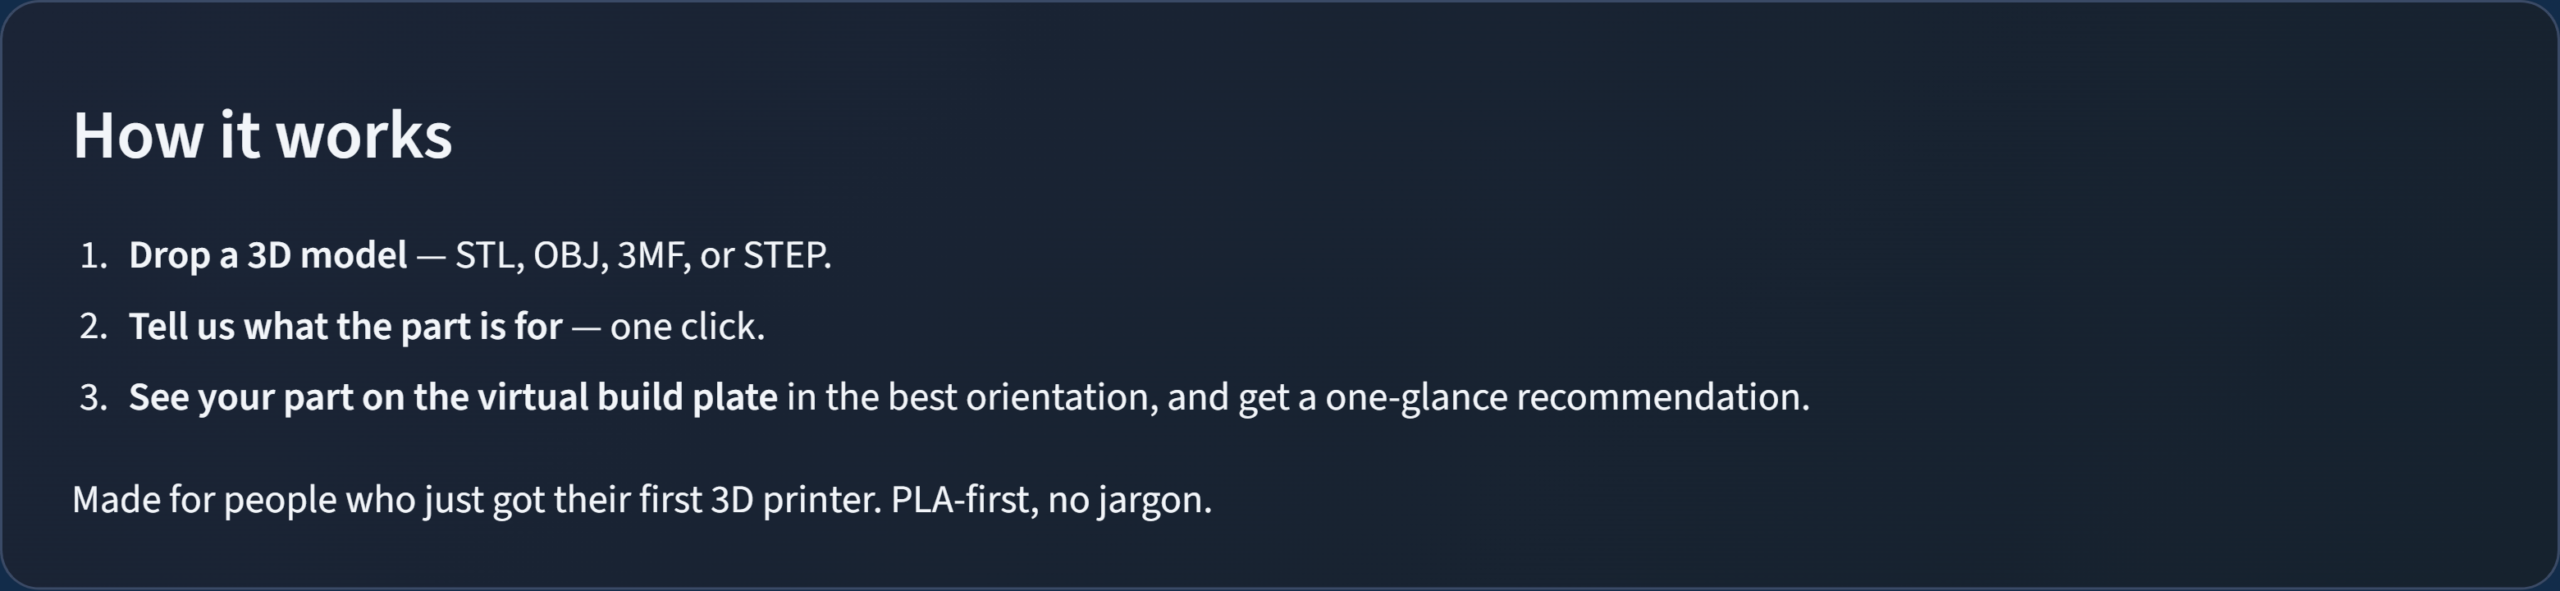
Drop a 3D model.
STL, OBJ, 3MF, or STEP. PrintWise3D loads it, repairs holes, fixes non-manifold edges, and flips inverted normals. Anything it patched, it tells you about.
Pick what the part is for.
Display, indoor functional, outdoor, tool / jig / fixture, heavy-use mechanical, flexible, or “gets warm.” That single click drives material, walls, infill, and orientation strategy.
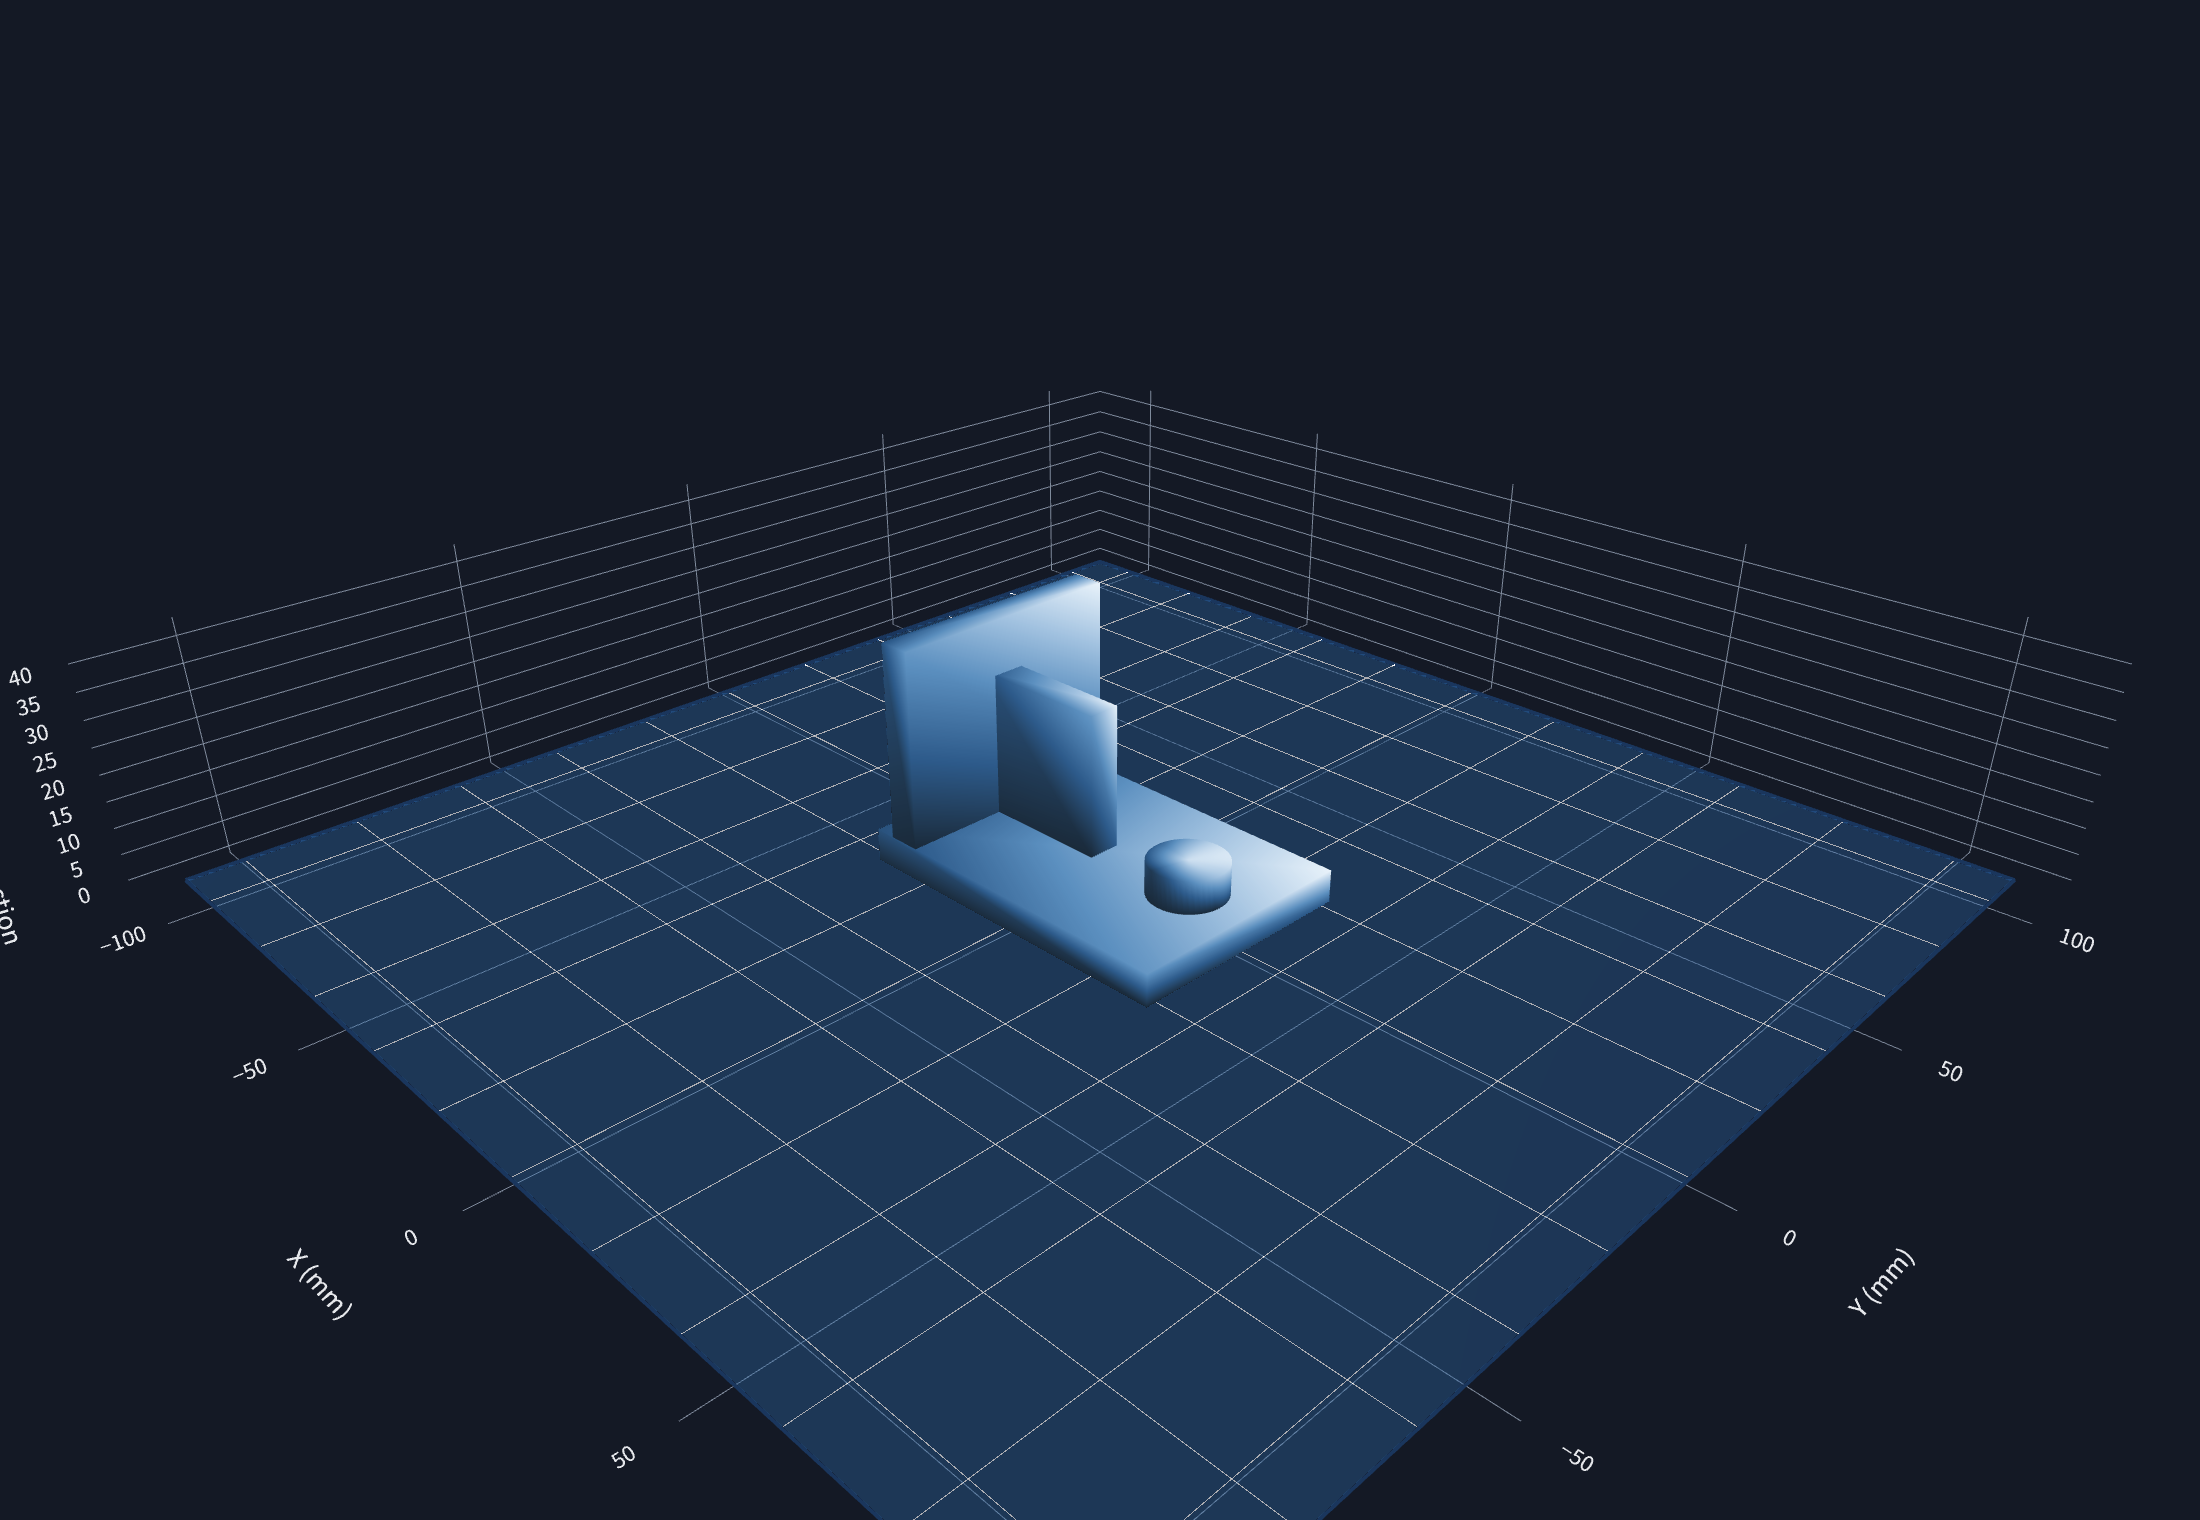
See it on the build plate.
A 3D view shows your part on the plate in the recommended orientation, with tabs for every ranked alternative. Switch supports off and the overhangs that will sag turn red. Add a load case and the whole surface colours by stress — green where the layers carry the load, red where they don’t.
Send it to your slicer.
Layer height, walls, infill, supports — already tuned to your filament and printer. Copy the four numbers by hand, or export a full profile for OrcaSlicer, PrusaSlicer, Creality Print, or Bambu Studio and have PrintWise3D open it for you.
See it in action.
From a raw model to slicer-ready settings in four steps.
Step 1 — Drop a 3D model
Step 2 — Pick what it’s for

Step 3 — See it on the build plate
Step 4 — Copy the four numbers

Professional tier — Load case
Click the sides. We’ll do the physics.
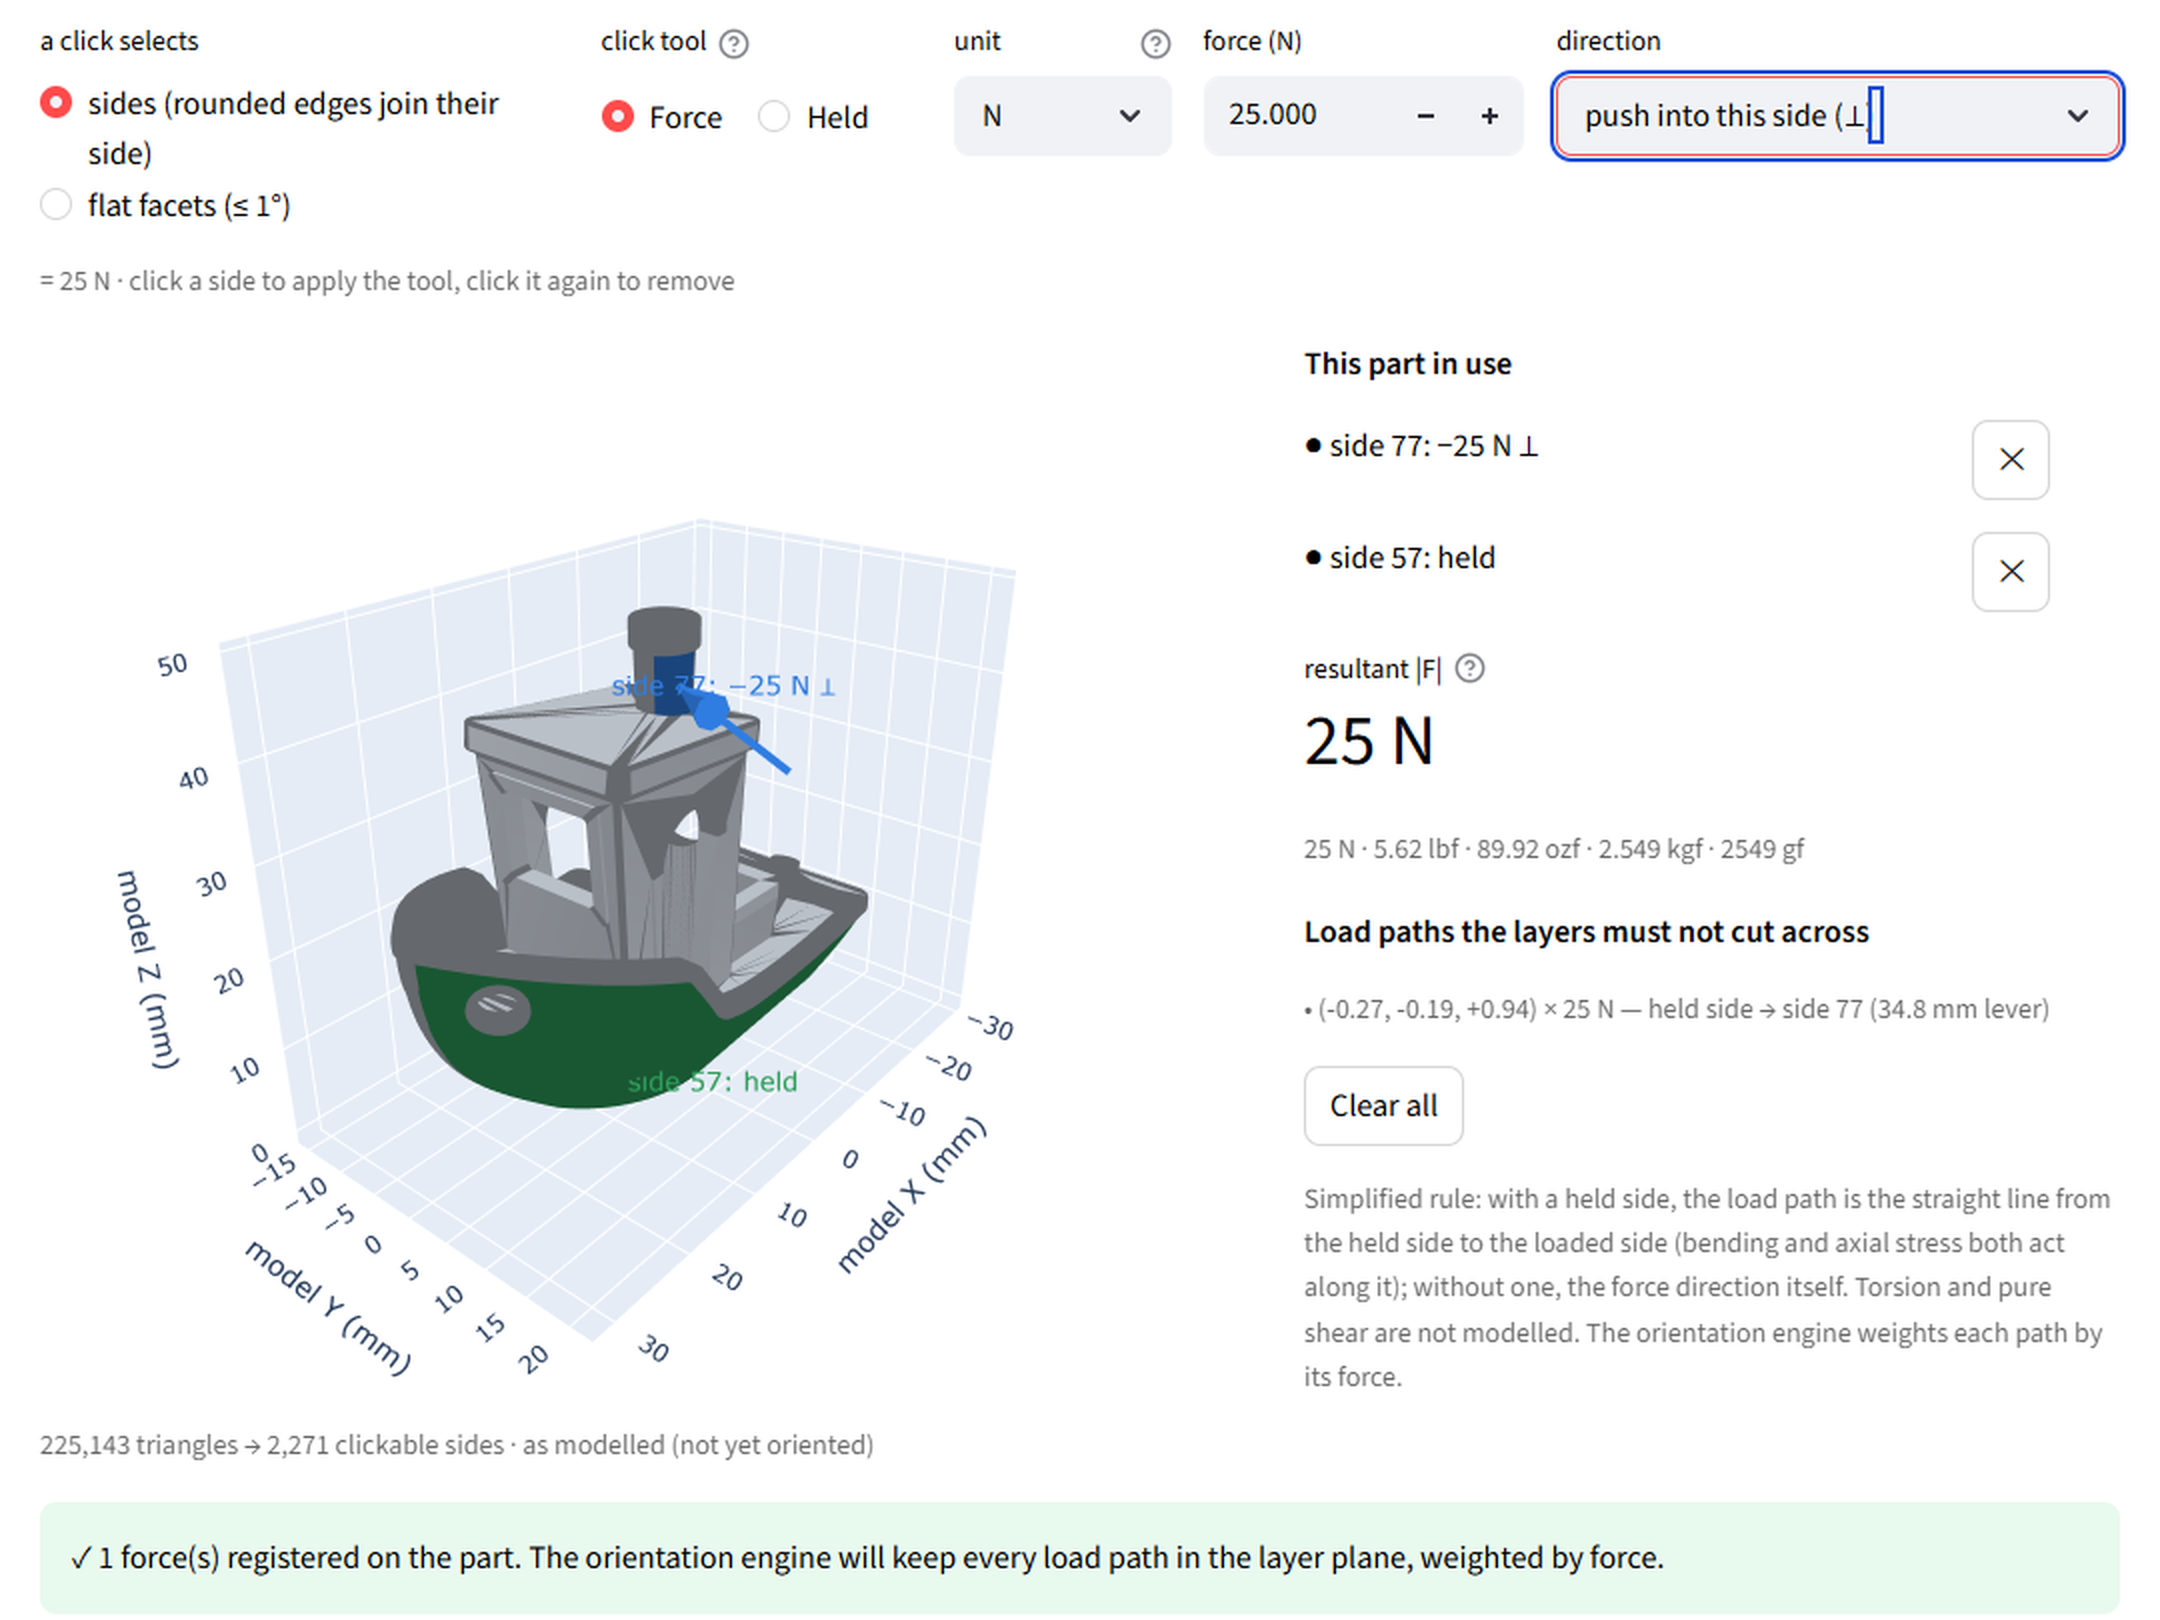
Click the side of your part that is held — screwed down, clamped, hung on a hook — and the side that takes the force, with how hard and which way. PrintWise3D orients the print so those load paths stay in the layer plane. You never type a vector.
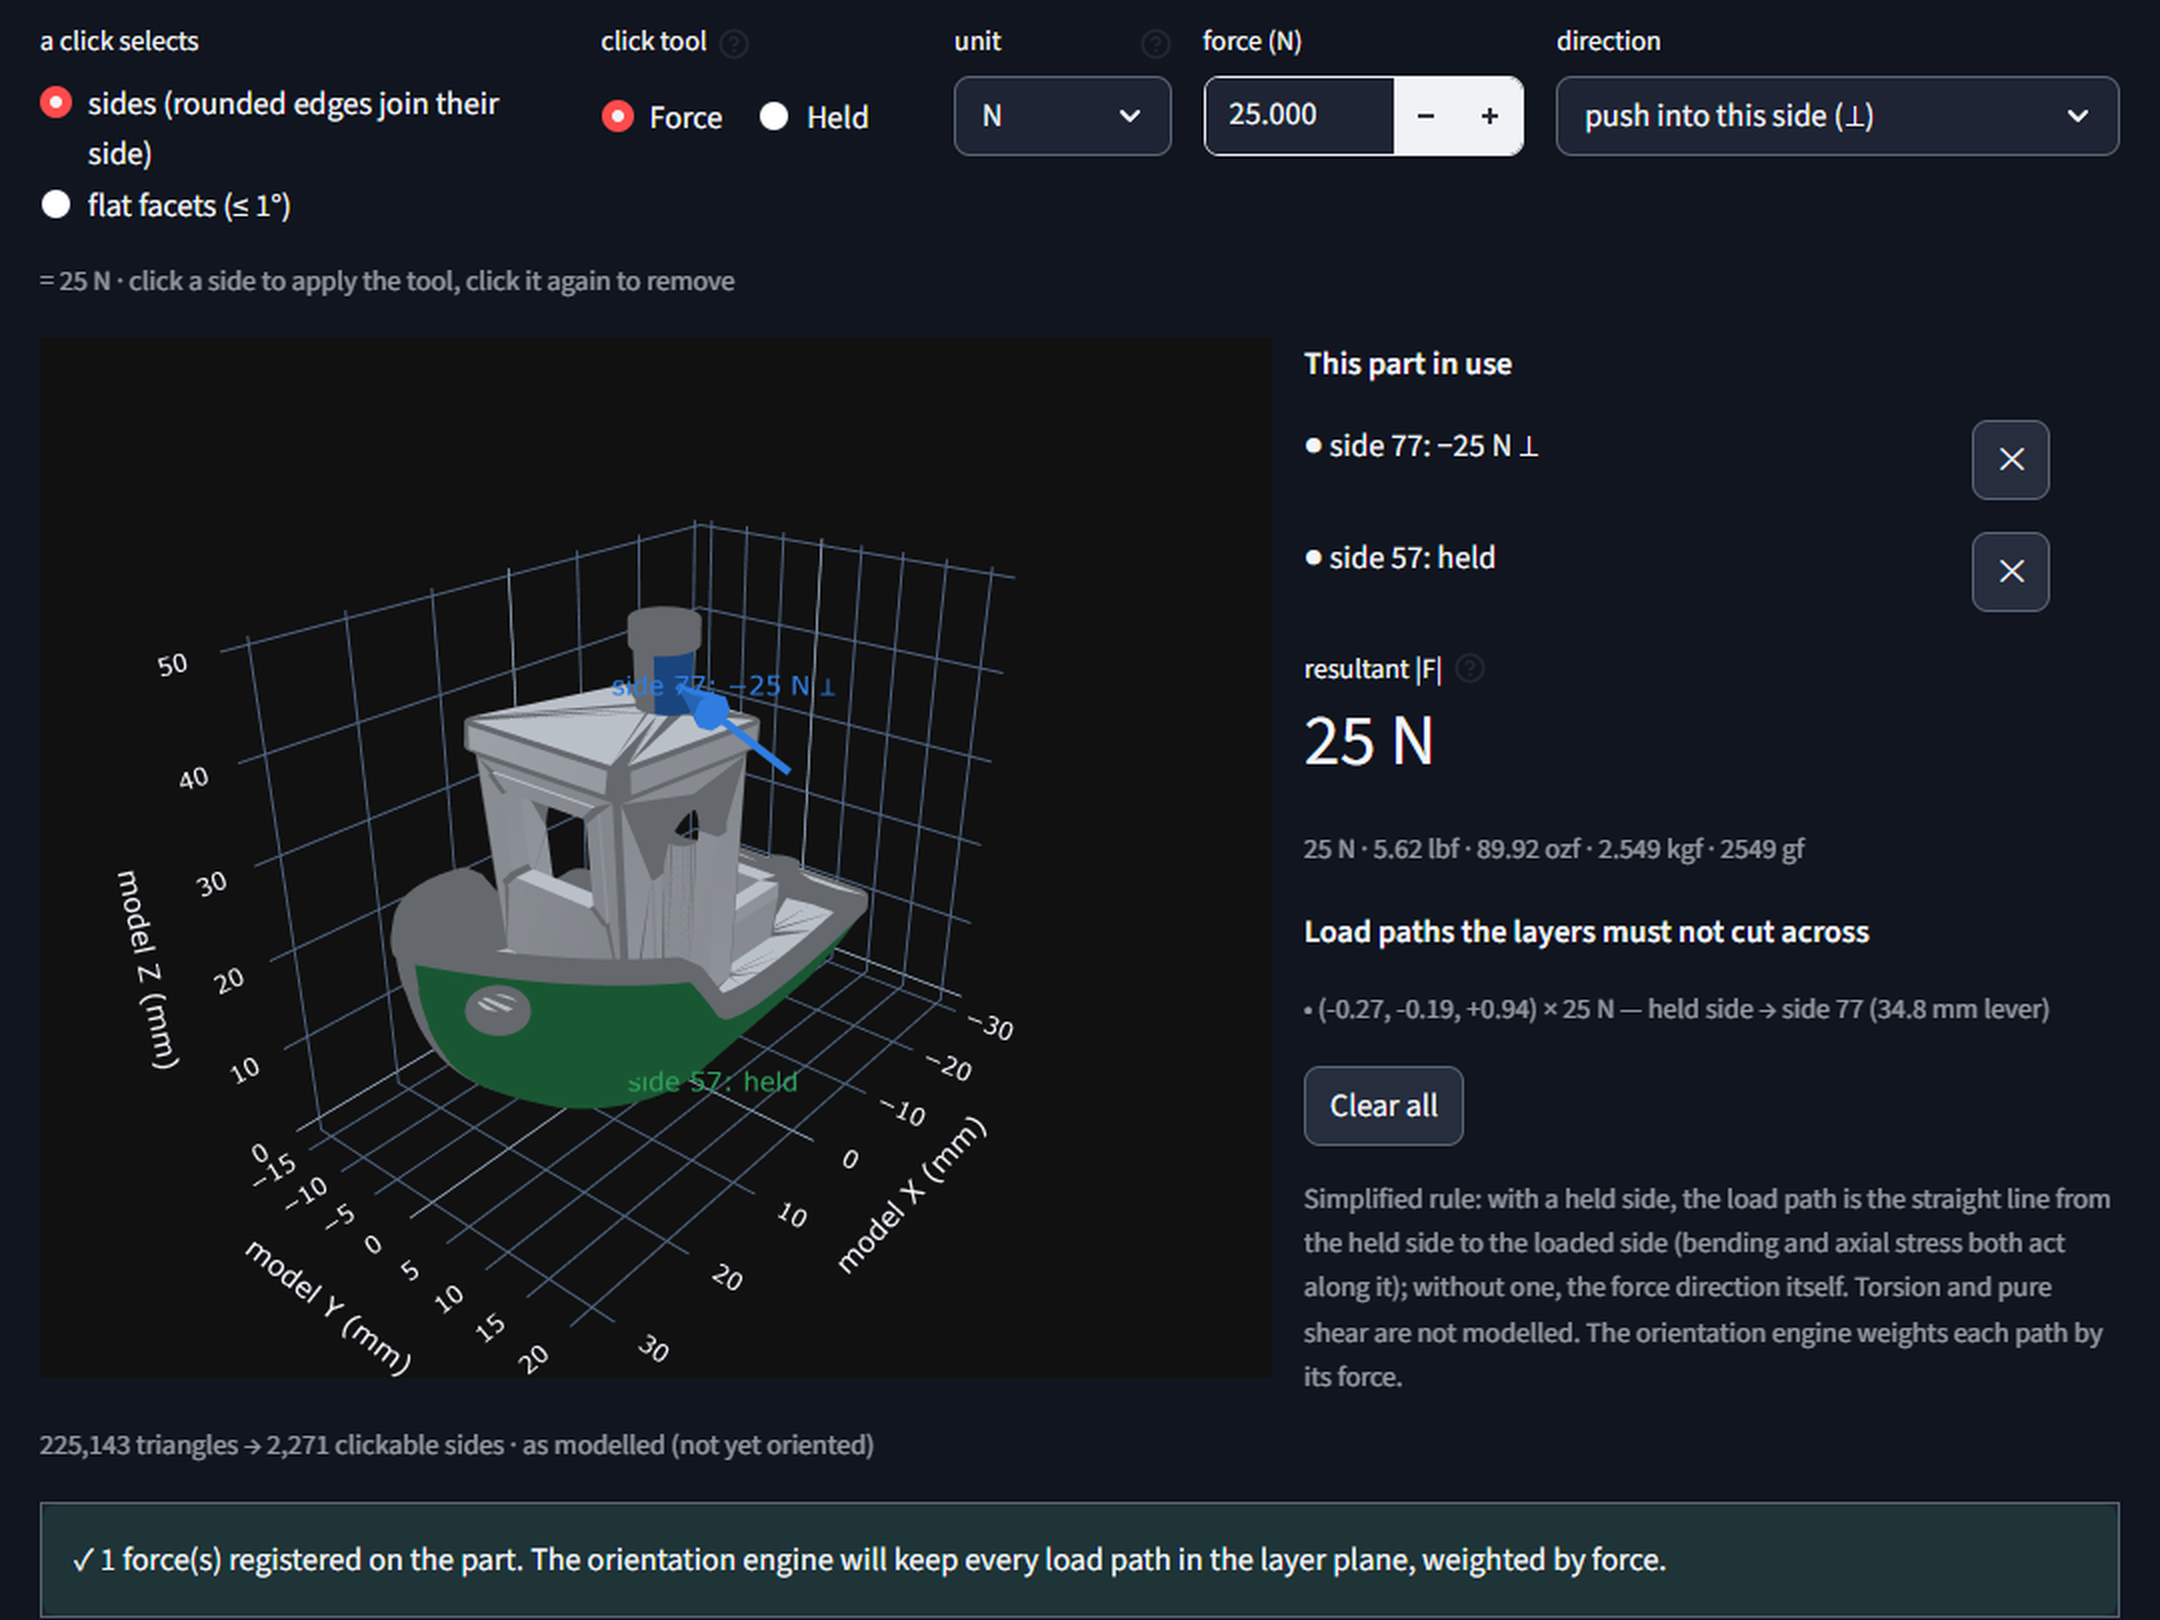
A 3DBenchy, 60 × 31 × 48 mm: hull marked held, 25 N pushed into the cabin roof. Green is held, blue is loaded.
Enter the force however you think about it. PrintWise3D shows the resultant in every unit at once — 25 N · 5.62 lbf · 89.92 ozf · 2.549 kgf · 2549 gf — and states the load path it derived before it orients anything.
What it changes
It doesn’t just re-rank the orientations.
It finds ones that weren’t there before.
Before the load case, this Benchy’s recommended orientation was “Lay flat (shortest print)” and the reason given was a flat “balanced trade-off across all criteria.” Two clicks later the engine had generated three orientations that do not exist without a load case — and moved its recommendation to one of them.
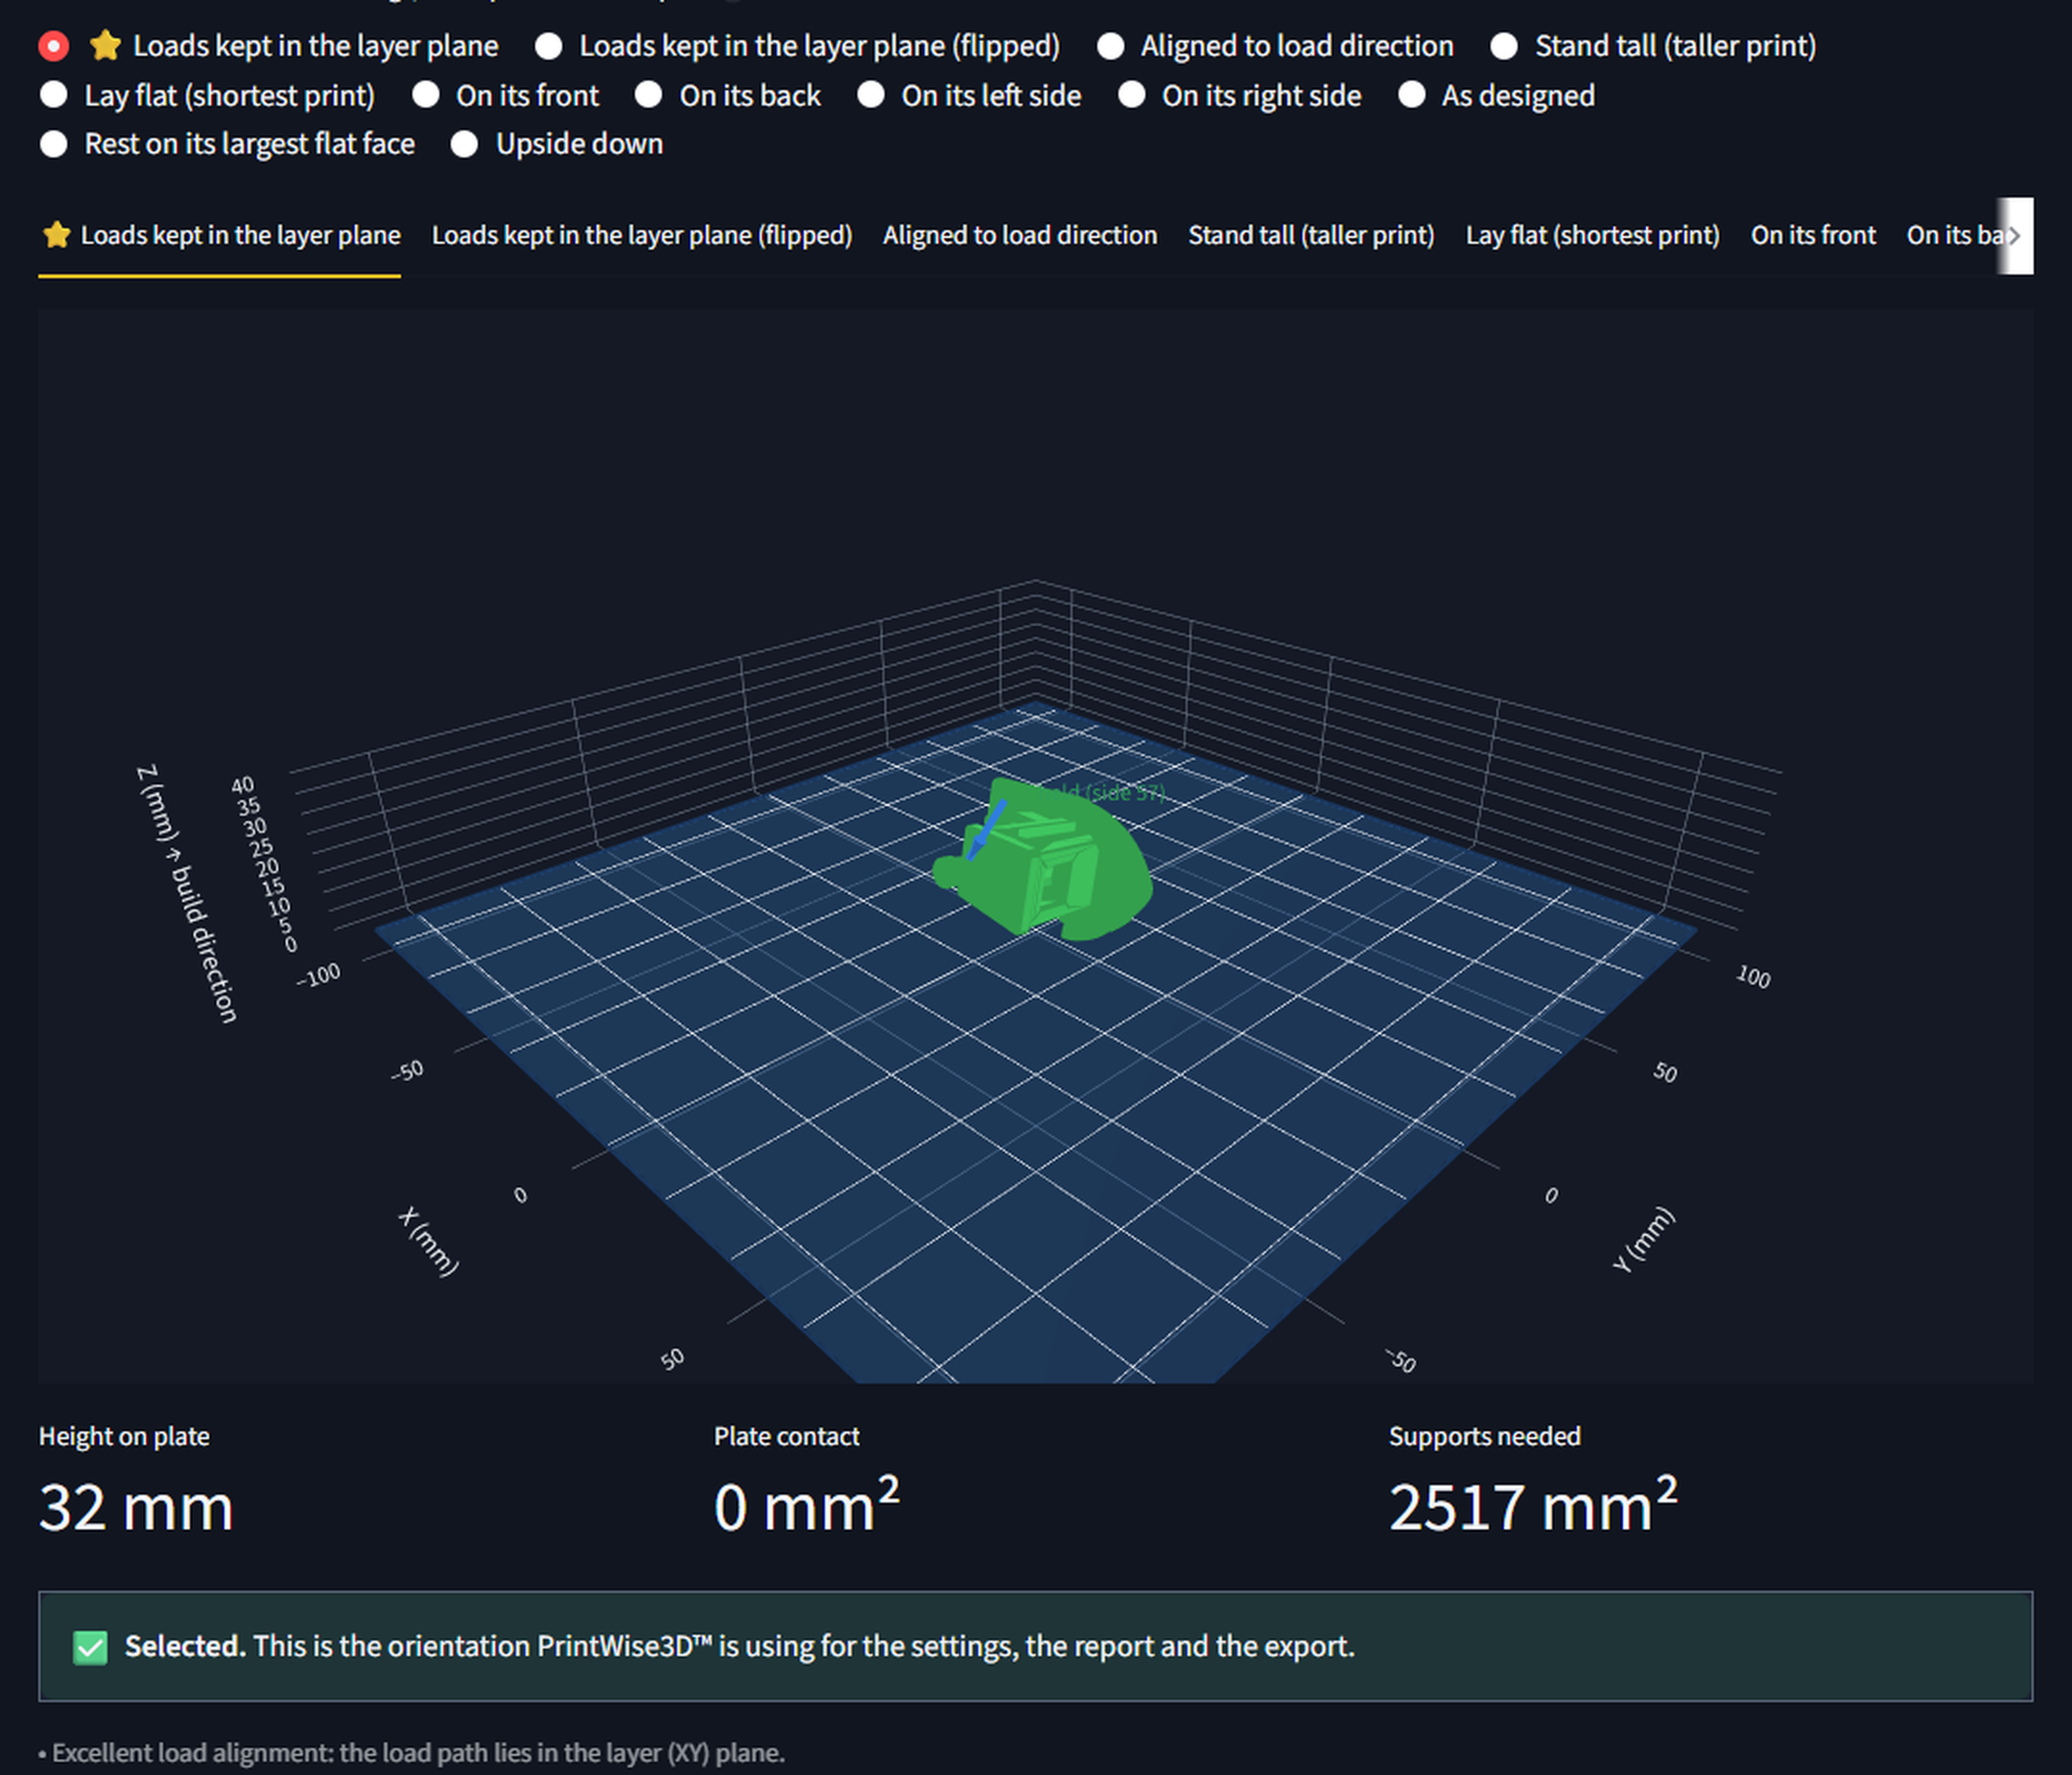
New candidates: “Loads kept in the layer plane”, its flipped twin, and “Aligned to load direction”. The reason line now reads: “Excellent load alignment: the load path lies in the layer (XY) plane.”
Light and dark
Same screen, whichever your eyes prefer.
The whole app ships light and dark — same data, same numbers, same 3D viewer.
The load-case picker is a Professional feature. Maker gets the orientation engine; Professional adds the load case, custom engineering rules, custom printer profiles, DB overrides, raw orientation scores and the Analysis console.
Under the hood.
The orientation engine, the structural maths and the slicer settings run the same at every tier — same code, same numbers. What changes is how much you see. The one deliberate exception: at Maker we keep the filament shortlist to PLA, PETG and TPU, so a first print never lands on something that needs an enclosure. Professional opens the full range.
Orientation scoring
Multi-objective ranking weighing strength alignment (50%), support contact (20%), Z-height + print time (15%), and first-layer stability (15%). Top 3–5 candidates, ranked. Pick one and the model lands in your slicer already rotated and centred on the plate. The rotation matrix is in the report if you want to check our work.
Anisotropy model
FDM parts are several times stronger in XY than Z. Z-tensile strength is assumed 35–65% of XY depending on filament. Critical Z-tension gets flagged loud.
Filament matching
1,406 brand-specific spools, each carrying its own hotend and bed temperatures, fan, retraction distance and speed, max volumetric flow and drying schedule. Behind them sit 11 base materials tagged by tensile / flexural / impact / temperature / UV / moisture — that’s what your part’s needs are matched against.
Infill + walls
10–20% decorative, 15–25% functional, 35–50% high-stress structural, 60–80% critical load-bearing. Thicker walls (3–6, up to 7 under Z-tension) outperform high infill for strength-per-gram. Gyroid / cubic default.
Support strategy
Tree supports default. Minimises contact on high-stress or high-finish surfaces. Suggests orientation changes that eliminate supports when possible.
Calibration pointer
New printer or filament? The calibration checklist tells you which test prints to run first — flow, pressure advance, Z-offset, XY compensation, temp tower.
Multi-material aware
MMU3, AMS, IDEX, toolchangers. Compatibility matrix per material pair, purge-tower volume math, interface-layer planner. Professional tier.
OTA database
New printers, filament brands and build plates arrive as signed updates — checked twice before anything installs. A pack that’s been tampered with simply doesn’t load, and the app carries on with the data it shipped with. Check for updates on your schedule. Custom overrides survive the merge.